Yay me! That was a fast year.

I've been told by a certain someone in my house that the word Blogiversary is dorky. The thought that I would actually make a cake to celebrate said event qualifies as some sort of affliction that may require an intervention. There were whispers to their friends that they weren't sure why I was making a cake. My youngest tried to pass it off as a cake for her half birthday. Right.......Oh how they changed their tune once it was all frosted and set out on the counter.

 I should have just made them watch me eat it, but you know, it was a big cake.


One year ago I started my blog. No scratch that, 3 years ago I started my blog, it was only 1 year ago that I actually wrote something. Now THAT is dorky.

When I started this blog I was certain that only my darling husband and my mom would read it. My inner middle school girl certainly thought this was a bad idea. However, it's been fun. I've met some interesting people (if you can call exchanging comments or emails really meeting), and I challenged myself to do something that I wasn't entirely comfortable with. I found that writing for yourself is much more fun than writing when it is assigned or part of your job. I'm mean what would you rather write about, this Buttermilk Vanilla Layer Cake or about the epidemiology of tuberculosis among South East Asians. I'll leave that for you to decide.

So a big thank you to those of you who are not related to me who stop by here, and an even bigger thank you to my husband who likes to push me into new adventures! I love you and I ate your piece of cake.


This cake is a very old fashioned yellow cake. The cake is soft and moist with a tender crumb but it holds up well to a fudgy frosting. I think it's the perfect thing to make for a birthday or really any dorky event that comes up.

Rich Yellow Buttermilk Cake with Fudge Frosting

For the cake:
4 tablespoons of unsalted butter at room temperature
1/2 cup vegetable oil
1 1/2 cups granulated sugar
6 large eggs yolks at room temperature
1 tablespoon pure vanilla extract
3 cups cake flour
4 teaspoons baking powder
1teaspoon salt
1 cup buttermilk
For the frosting:
1 1/2 pounds semi-sweet chocolate chopped fine
2 cups heavy cream
8 tablespoons butter cut into small pieces
1/2 cup sugar
2 teaspoon pure vanilla extract

Preheat the oven to 350 degrees F. Lightly grease and flour 2, 9 inch round baking pans.

Make the cake layers:
In the bowl of a stand mixer cream together the butter, oil, and sugar for 5 minutes on medium speed. Add the egg yolks 2 at a time beating for 20 seconds after each addition. Stir in the vanilla and then scrape down the bowl.
In a large bowl whisk together the flour, baking powder, and salt. Add the dry ingredients to the butter mixture in thirds alternating with the buttermilk. Begin and end with the dry ingredients, completely incorporate the flour after each addition. Scrape down the bowl and divide the batter evenly between the 2 prepared cake pans.
Bake for 30-35 minutes or until a cake tester inserted in the middle comes out clean.  Let the cakes cool for 10 minutes, then turn the layers out onto wire racks to cool completely.
Make the Fudge Frosting:
Place the chopped chocolate in a large heatproof bowl, set aside.
In a heavy medium sized saucepan, heat the cream, butter, and sugar over medium high heat. Cook, stirring constantly, until the sugar is dissolved. Increase the heat to high and bring to a simmer. Immediately pour the cream mixture over the chocolate. Let stand for 2 minutes and then stir until smooth. Stir in the vanilla and then let the mixture cool for 30 minutes.
Set the bowl of frosting in a larger bowl of ice water (after it has cooled for 30 minutes). Beat the frosting using an electric mixer until the frosting thickens and becomes lighter in color. Be careful not to overbeat the frosting as it will make the mixture grainy. Finish by folding the frosting together with a wooden spoon.
Assemble the cake:
Place a cake layer on a serving platter, plate or pedestal. Using an offset spatula spread 1 cup of frosting over the top of the first layer.  Top with the second layer. Spread 1 cup of frosting evenly over the top of the second layer. Use the remaining frosting to frost the sides. Decorate as desired.

It's here part 2

If you've been following along you know that 6 months ago we packed up all of our belongings in Singapore for our move to Tunisia. Ok, to be truthful we didn't pack a thing. The school hired a moving company to pack everything, we just sort of watched. For the past several months our stuff has made the long voyage from the Straits of Malacca, through the Indian Ocean to the Arabian Sea and then I'm not really sure where it went, but eventually it arrived in Tunisia.  Finally, last Wednesday afternoon, we were given the great news that our shipment would be delivered to our house the next morning. That in and of itself is a glorious sentence to write. Witnessing the arrival of our container in front of our house was nothing short of rainbows, unicorns, and Christmas all rolled into one ridiculously happy morning.

The driver of this rig is my hero. 
He moved this giant container down our tiny lane like a boss!
See that large red shrub?

That is our neighbors Poinsettia tree. 
A tree! Gorgeous!

The fastest, nicest, dare I say, BEST movers we've ever worked with!

Part of the 168 boxes that needed to be unpacked.

Not bad for an afternoons work. 

If you've never had the pleasure of having a moving company handle your move, I'm sorry. I hate moving so I am quite happy to have someone do all the packing for me. You do need to be watchful though or you'll end up with some strange things being packed that you really don't want, like your garbage for instance. I had a friend who wasn't watching as her kitchen was being packed and the movers just wrapped up her full garbage can. It sat in a cargo container in the Saudi Arabian heat for months until it was delivered to her new home.

I don't think that was a very fun discovery to make. 

We had a few surprises, nothing smelly thank goodness. Apparently we owned 5 cans of silly string and a slinky which was packed and shipped halfway around the world. Hmmm. I could also tell that I had decision fatigue at a certain point in the move. How else can you explain a box filled with used candles, half full bottles of nail polish, and game pieces that belong to a game we no longer own.

We got a lot done this weekend, nearly every box is empty and we are just now trying to organize the house. This is the part that I love and loathe. I love it because this is when the house really starts to feel like a home. We have art work that we picked out when we were on holiday in Vietnam, the girls Christmas stockings to hang, our own mattresses to sleep on. I loathe it because I put things away in very clever places and then never remember where that might be and, at some point I become overwhelmed and think it would be easier to set the remaining unpacked boxes on fire and give them a Viking funeral. 

Sunday felt like a day to celebrate! I had purchased a gorgeous Brioche at my favorite boulangerie on Saturday with the idea that I would make French Toast for breakfast Sunday morning. I decided to make a baked French Toast, sort of like a bread pudding. Actually, exactly like a bread pudding except not as sweet. Before baking it, I slathered a mixture of melted butter, brown sugar, and cinnamon over the top. This baked up beautifully, it was souffle like and the brown sugar topping was very crisp in places like the top of a creme brulee with the added bonus of little pools of buttery caramel dotted throughout.

Creme Brulee Baked French Toast

Creme Brulee Baked French Toast
1 large Brioche, approximately 11/2-2 pounds cut into 1 inch pieces
1/4 cup sugar
1 teaspoon ground cinnamon
1 teaspoon of vanilla extract
8 eggs
3 cups half and half
pinch of salt
1 cup of butter
1 cup of dark brown sugar
2 tablespoon of corn syrup
1/2 teaspoon of cinnamon
1/2 cup of chopped pecans
maple syrup

Preheat oven to 350 F. Place all the bread in a large bowl. In a medium size mixing bowl mix together until well blended the sugar, cinnamon, vanilla extract, eggs, half and half and a pinch of salt. Gently stir together and set aside for 2 hours or overnight. This allows the bread to soak up all the custard. When you are ready to bake the French toast, spoon the bread mixture evenly into a greased 9X13 inch baking dish.

In a small saucepan melt the butter, over medium high heat, with the brown sugar, corn syrup, and cinnamon. Cook this mixture until the butter and sugar are melted together and the sugar is no longer grainy, about 5-8 minutes. Carefully pour this evenly over the top of the bread mixture. Sprinkle with the pecans and bake for 30 minutes or until puffed and lightly browned.

Serve with maple syrup.

Its here!

6 months ago my house in Singapore looked like this


And today, after a long ocean voyage, numerous customs checks, scans, and stamps, and a few weeks sitting on a North African dock, we will be reunited with all our "stuff". 

I'm not even sure what we packed, but I do know that there is a new block of knives, my food processor, and tongs in there somewhere.

Even though today means trying to speak to the movers in a mixture of pantomime and French (really Franglish), unpacking a myriad of boxes, and hopefully finding a few extra ounces of patience and grace I am really, really, really excited!

Full of Thanks

We have had a busy week. Last weekend we went to Barcelona (I know, poor me) to watch our daughter compete in a volleyball tournament. We only saw a few snippets of the city, but oh, I fell hard for Barcelona. I need to find a way to get back there soon.


Of all the things one could take photos of in Barcelona this was my favorite. The changing colors of the leaves. I was reveling in my love for Autumn, when I realized we are nearing the end of November which I guess technically qualifies as winter.


I don't know about that though, the skies were impossibly blue, the air crisp but not so cold that you needed to bundle up, and by mid-day you could ditch the jacket if you were walking briskly.


After watching volleyball all day we would head to Las Ramblas, which is a pedestrian mall downtown. The street is flanked by high end retail, tapas bars, gelato stands, souvenir shops, and La Boqueria market. The market was beautiful and you can stroll through all the produce stands while sipping sangria (in a to go cup with straw mind you) and nibbling on a freshly made calzone.

We returned home to a short sprint of a work week leading to Thanksgiving weekend. I really love Thanksgiving, and enjoy filling our house with friends and family, sharing a meal together, and also sharing what we are thankful for. This year we spent the evening with some new friends who also moved to Tunisia this year. We shared stories of our family's holiday traditions, talked about life, and laughed a lot.

The past few months have been filled with many new experiences, the pendulum has swung from the maddening to the exhilarating (and back and forth a few times)  I realized during one maddening episode that I can be mad and let my thoughts run to the negative, OR I could be thankful. Sometimes being thankful is hard. One day the only thing I could think of to be thankful for was the fact that I liked the scent of my dish washing liquid. That was a bad day.

Today though, I am full of thanks. I am thankful for my husband, his eternal optimism and sunny personality makes our days brighter. My daughters who are so beautiful, witty, and kind. My family who love us and whose presence I miss so much. Our friends both near and far who we have travelled life with.

I am thankful!

Now, what to do with that leftover turkey?  I'm planning to make soup from the leftover carcass. David Tanis writes the City Kitchen articles in the New York Times and he has a recent article on what to do with Thanksgiving leftovers besides the usual sandwiches and casseroles. He suggests this soup that is fragrant with lime, warm with chilies and has the earthiness of corn tortillas. I'm in. 

Turkey Soup With Lime and Chile
Time: About 1 hour

2 tablespoons vegetable oil
1 cup diced onion
1 cup diced celery
1 cup diced carrot
1/2 teaspoon cumin seed
1/2 teaspoon coriander seed
1/2 teaspoon black peppercorns
6 garlic cloves, roughly chopped
1 cinnamon stick, 2 inches long
Cayenne
2 teaspoons salt, or to taste
8 cups unsalted turkey or chicken broth
Vegetable oil for frying
4 corn tortillas, at least a day old, cut in 1/2-inch strips
4 to 6 cups cooked turkey meat, shredded
1 or 2 firm-ripe avocados
6 scallions, chopped
2 jalapeños, thinly sliced
1 small bunch cilantro, leaves and tender stems, roughly chopped
Lime wedges.

1. Heat vegetable oil in a heavy-bottomed soup pot over medium heat. Add the onion, celery and carrot and let soften, stirring occasionally, for about 5 minutes.
2. Toast the cumin, coriander and peppercorns in a small dry skillet over medium-high heat until fragrant, about 1 minute, then grind in a spice mill or mortar. Add the ground spices to the pot, along with the garlic, cinnamon, a pinch of cayenne and salt.
3. Add the broth and bring to a boil, then reduce to a brisk simmer. Cook for 15 minutes, then taste for salt and adjust. Keep hot, covered, over very low heat.
4. Pour vegetable oil to a depth of 1/2 inch into a wide skillet over medium-high heat. When the oil is hot and looks wavy, add the tortilla strips and fry until barely colored, 1 to 2 minutes. Remove with tongs and drain on paper towels. Sprinkle lightly with salt. (The oil may be strained and saved for future frying.)
5. In a medium saucepan, heat the shredded turkey meat with a little of the hot soup. Divide the meat among 4 to 6 soup bowls and add a few slices of avocado to each. Ladle about 1 cup soup into each bowl, then garnish with tortilla strips, scallions, jalapeño slices, chopped cilantro and a generous squeeze of lime juice.
Yield: 4 to 6 large servings.

I Like Big Bundts

I wish that I was the clever person who came up with that line. The person responsible for spreading Bundt Cake love all over the Internet is none other than the Food Librarian.  For the past 3 years she has celebrated November 15, National Bundt Cake Day with a lead up of 30 days of Bundts.

She's awesome. I want to be her friend.

I had been planning to make a special Bundt Cake for this day. I wanted to make something that reflected the flavors of North Africa, maybe a Halva Bundt, or a Bundt with preserved lemons, and it would be made with Tunisian olive oil, bien sur!

But time got away from me.  I did however make an Apple Bundt for a sleepover breakfast. It was filled with loads of shredded apple, crystallized ginger, and toffee bits. We served it warm with yogurt and homemade applesauce. It hit all the right notes for a crisp November morning.

Happy National Bundt Cake Day by the way!

I like Big Bundts and I cannot lie, you other brothers can't deny......

Brown Butter, Caramel Apple Cake
Nonstick vegetable oil spray
1 cup butter
3 cups all purpose flour
2 teaspoons ground cinnamon
1 teaspoon baking soda
1 teaspoon salt
1 cup applesauce
1 cups (packed) golden brown sugar
¼ cup chopped crystallized ginger
½ cup chopped toffee bits such as Heath brand
1/2 cups vegetable oil
1 cup sugar
3 large eggs
3 teaspoons vanilla extract
3/4 cup pecans, coarsely chopped (about 3 1/2 ounces)
Applesauce, Greek yogurt and crystallized ginger for serving

Preheat the oven to 350°F. Spray 12-cup Bundt pan with nonstick spray.
Slice the butter and place it in a heavy gauge saucepan.  Melt the butter over medium high heat stirring frequently. Once the butter melts it will start to foam. The foam will soon subside and you will notice brown bits beginning to form on the bottom of the pan.  Watch the butter carefully at this point. The butter should have a pleasant nutty aroma and change from golden yellow to light mahogany in color. Remove the butter from the heat and place on a cool surface or in a small bowl to prevent it from burning. Allow the brown butter to cool.
In a medium bowl whisk together the flour, cinnamon, baking soda, and salt.
In a large mixing bowl combine the browned butter, applesauce, brown sugar, crystallized ginger, vegetable oil, sugar, eggs, and vanilla. Using electric mixer, beat until mixture is thick, about 4 minutes. Gradually add the flour mixture, and then stir the pecans into the batter; transfer to prepared Bundt pan.
Bake cake until tester inserted near center comes out clean, about 1 hour. Transfer cake in pan to rack and cool to room temperature.  Serve with applesauce, yogurt and more crystallized ginger if desired.


A reason to get out of bed in the morning!

Make this the next time you need to get someone out of bed in the morning.


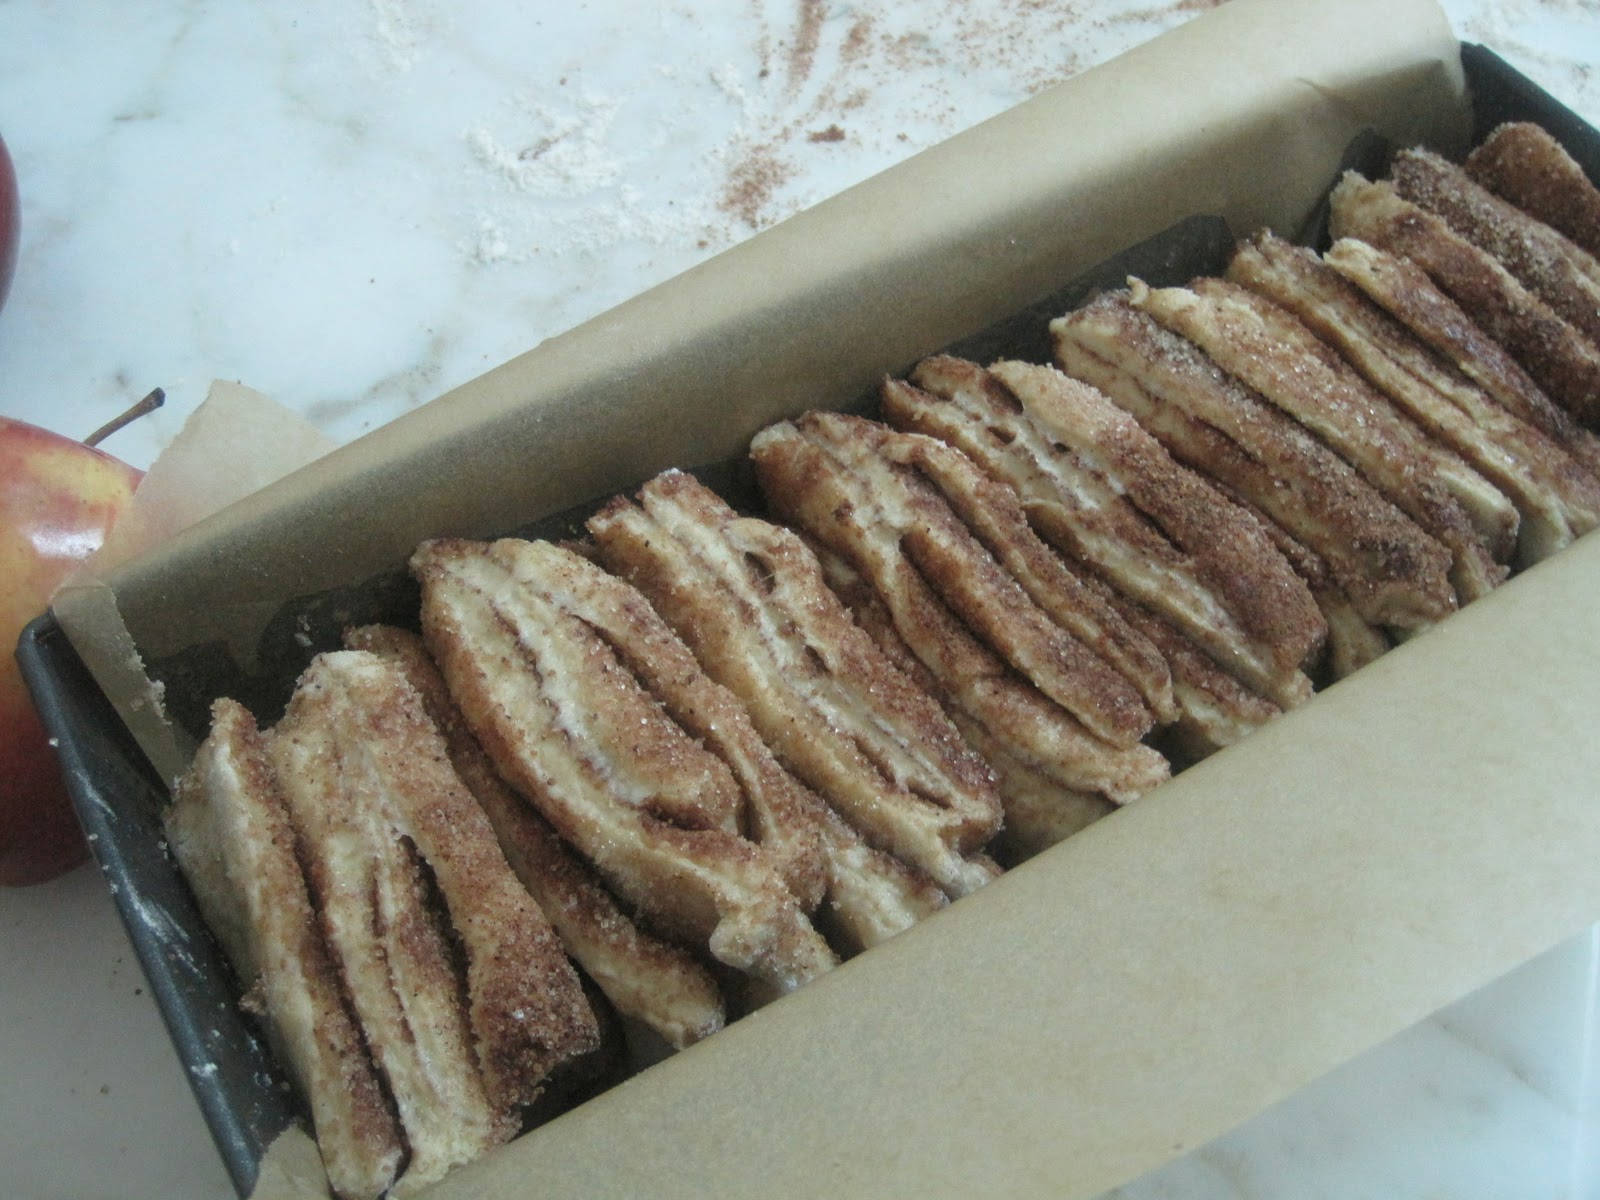
Would you not have a little spring in your step if you woke to the smell of cinnamon, cocoa, and bread baking? Well, if it was this bread and some coffee. Yes, that would do it.

I saw this pull apart bread recipe on Joy the Baker's website and immediately felt compelled to make it. I had to wait three whole days before I had the time to make it. Three whole days of staring longingly at the photos, reading the recipe over and over.  I mean look at it, how could you not?

I was so completely obsessed with this bread that it was very late at night before I was able to make the dough and get it snuggled in the fridge for an overnight rest.

It is a yeast dough made rich with butter and eggs then rolled out and spread with browned butter, sugar, cinnamon and cocoa.  It is very similar to making cinnamon rolls but instead of rolling the dough up into a log and slicing it, you slice this dough into strips, stack them, cut them into sections and then place them in the pan sort of like a flip book.

What sort of evil genius came up with this?

I had to summon every spare ion of self control I could muster to take a few photos before I called my family to breakfast.  This was really lovely. Some of the sugar caramelized making the edges crunchy, the middles were soft and yeasty, and the cocoa rounded out the flavors and made it seem, if possible, richer and more decadent.  I hope you'll make this soon for someone you love, or better yet, I hope you wake tomorrow morning finding that someone has made this for you!

We added a little icing drizzle to the top while it was still warm. Oh my.

The finished product.

Cinnamon Sugar and Cocoa Pull-Apart Bread
Makes: one 9x5x3-inch loaf
For the Dough:
2 cups plus 2 tablespoons all-purpose flour
¾ cups whole wheat pastry flour
1/4 cup granulated sugar
2 1/4 teaspoons (1 envelope) active dry yeast
1/2 teaspoon salt
2 ounces unsalted butter
1/3 cup whole milk
1/4 cup water
2 large eggs, at room temperature
1 teaspoon pure vanilla extract
For the Filling:
1 cup granulated sugar
2 teaspoons ground cinnamon
2 tablespoons unsweetened cocoa powder
2 ounces unsalted butter, melted until browned
For the Glaze:
1 cup powdered sugar
3 tablespoons milk
1/2 teaspoon vanilla extract

In a large mixing bowl whisk together all purpose flour, sugar, yeast, and salt and then set aside.
Whisk the eggs until well combined and set aside.
In a small saucepan, gently warm the milk and butter over medium low heat until the butter is melted.  Remove from the heat and add the water and vanilla extract.  Let mixture stand for a few minutes, or until the mixture registers 115 to 125 degrees F.
Pour the milk mixture into the dry ingredients and mix with a spatula.  Add the eggs and stir the mixture until the eggs are incorporated into the batter.  The dough will be very wet and seem like it will never come together.  Be patient, keep stirring.  Add the whole wheat pastry flour and stir with the spatula until the flour is incorporated. You still want the dough to be a bit sticky but it should be smooth and elastic looking. 
Place the dough in a large bowl that has been oiled with a bit of vegetable oil.  Give the dough a turn to make sure the top surface is lightly oiled. Cover with a clean kitchen towel and place in a warm spot to rise until doubled in size, about 1 hour. After the dough has had a chance to rise you can place some plastic wrap over the dough and place it in the refrigerator overnight.  Before continuing with the recipe allow the dough to come to room temperature, about 30 minutes on the kitchen counter should do the trick.
If you plan to make the bread right away, then while the dough rises, whisk together the sugar, cinnamon and cocoa for the filling.  Set this aside and then melt 2 ounces of butter over medium heat until browned.  Remove the butter from the heat and set aside.  
Lightly oil a 9x5x3-inch loaf pan, line the pan with parchment paper and preheat the oven to 350 F.
Deflate the risen dough and knead in about 2 additional tablespoons of flour.  Cover again and let rest for 5 minutes.  On a lightly floured work surface roll out the dough to a rectangle approximately 12 by 20 inches.  By all means guesstimate! Brush the melted butter evenly across all of the dough.  Sprinkle with all of the sugar mixture.
Slice the dough into four equal strips.  Carefully stack the strips on top of one another and then slice the stack into eight equal portions.  You’ll have eight stacks of four squares.  Layer the dough squares in the loaf pan like a flip-book.  Place a kitchen towel over the loaf pan and allow in a warm place for 30 to 45 minutes or until almost doubled in size.
Place loaf in the oven and bake for 30 to 35 minutes, until the top is very golden brown.  Joy warns that "The top may be lightly browned, but the center may still be raw.  A nice, dark, golden brown will ensure that the center is cooked as well".
While the bread is baking mix together the powdered sugar, milk and vanilla extract. Stir until smooth and set aside.
Remove from the oven and allow to rest for 20 to 30 minutes. If you are able to accomplish this you may be canonized for saint hood. Evenly drizzle the icing over the warm bread. Lift the bread out of the pan using the parchment paper.  Serve warm with coffee or tea.
I think this bread is best served the day it’s made, but it can also we wrapped and kept at room temperature for up to 2 days. If it lasts that long.

I'm just here for the cookies

Scouting rises within you and inspires you to put forth your best.
Juliette G. Low, founder of Girl Scouts of the USA

I was a Girl Scout. I didn't like wearing my green uniform to school on Thursday's, it was itchy and a little too short after I had a growth spurt. I did however like feeling part of the group, all the cool girls in my grade were girl scouts. Our troop badge was the pansy, probably because it was purple, which was Janine's favorite color. Janine was the coolest of the cool girls in 5th grade.

I lasted a year.

I was really only after the cookies, specifically Thin Mints, and well, it was too much work to sell them. I had to give up valuable cartoon watching time on Saturday mornings to go to the local Safeway and stand outside to sell them.  I also had to give up valuable kickball time after school to go door to door to sell them. It was easier to sit with my sister in our green shag carpeted rec-room and just eat them while watching Gilligan's Island reruns. My parents financed the whole operation.

I was a slacker Girl Scout.

I didn't have many badges. I had one for crafts, I made a beaded macrame hanging plant holder. I had one for cooking, and one for first aid. Pretty sure that was all. The first aid one might not be true.

The Girl Scouts have unveiled a new badge to go along with their 100 year anniversary.


It is the new "Lovavore" badge.  It it awarded to those who explore their local food movement, farmers markets, sustainable farming, health, nutrition, and the environment. 

To earn the badge the Scout must:
1: Explore the benefits and challenges of "going local".
2: Find local food sources.
3: Cook a simple dish showcasing local ingredients.
4: Make a recipe with local ingredients.
5: Try a local food challenge.
Each of the steps includes specific challenges such as interviewing chefs who specialize in locally grown foods, taking a favorite recipe and making it local, or preparing a three-course meal based on local ingredients.
And, just in case you think the Girl Scouts are jumping on the bandwagon of the local food trend, (because we all know how au courant those Scouts are),  Alisha Niehaus, the Executive Director of Program Resources, says that the organization has a long history of eating locally. She notes that the Girl Scouts had a Canner badge way back in 1920, almost a century before food preservation became cool. Hmm, maybe they are trendsetters after all.

Can you earn a Girl Scout badge in your 40's? I'm going for it, who's with me?
BLOG DESIGN BY DESIGNER BLOGS