Kefta Mkaouara

We are wrapping up our spring break holiday here. The girls went off to Singapore to see old friends, and we played host and tour guide to Andy's brother Mike here in Carthage. I was hoping to get to the gym regularly, meet a friend and her newly adopted daughter for coffee, drive out into the countryside, and get around to that "to do list". The reality however consisted of my coughing and wheezing, and alternately guzzling cough syrup and popping Tylenol for the first half of the week. Bronchitis is not a fun way to spend a holiday, though I'd take it over the stomach flu anytime.

While the cough and congestion lingers a little I was feeling well enough for a short outing here and there by midweek. Andy and I made it out to the ruins of Utica. Utica was the first Phoenician colony founded in North Africa. It was a sweet spot, the ruins aren't as impressive as Dougga, but they are easily navigated, and it's a nice place to stop for a picnic lunch and stroll through the hills.


On our walk through the hills we came cross a young man tending his cattle and then a few feet further down the path we ran across some sheep. The lambs were adorable, springing straight up in the air.


Another outing led us to Le Musee National du Bardo, the Bardo houses an impressive collection of mosaics taken from all over Tunisia. I was set to be underwhelmed, but the museum turned out to be a very pleasant surprise. Not all the exhibit space is open yet, there is extensive renovation going on. It will be fabulous when completed.

This mosaic of Poseidon was one of my favorites.


And the door....


I have a well documented thing for doors.


I don't know why this one wasn't painted blue as is the custom. Sometimes if they have the Star of David, as this one does, they will be painted yellow. I loved seeing this in its natural wood state. I think it's beautiful.

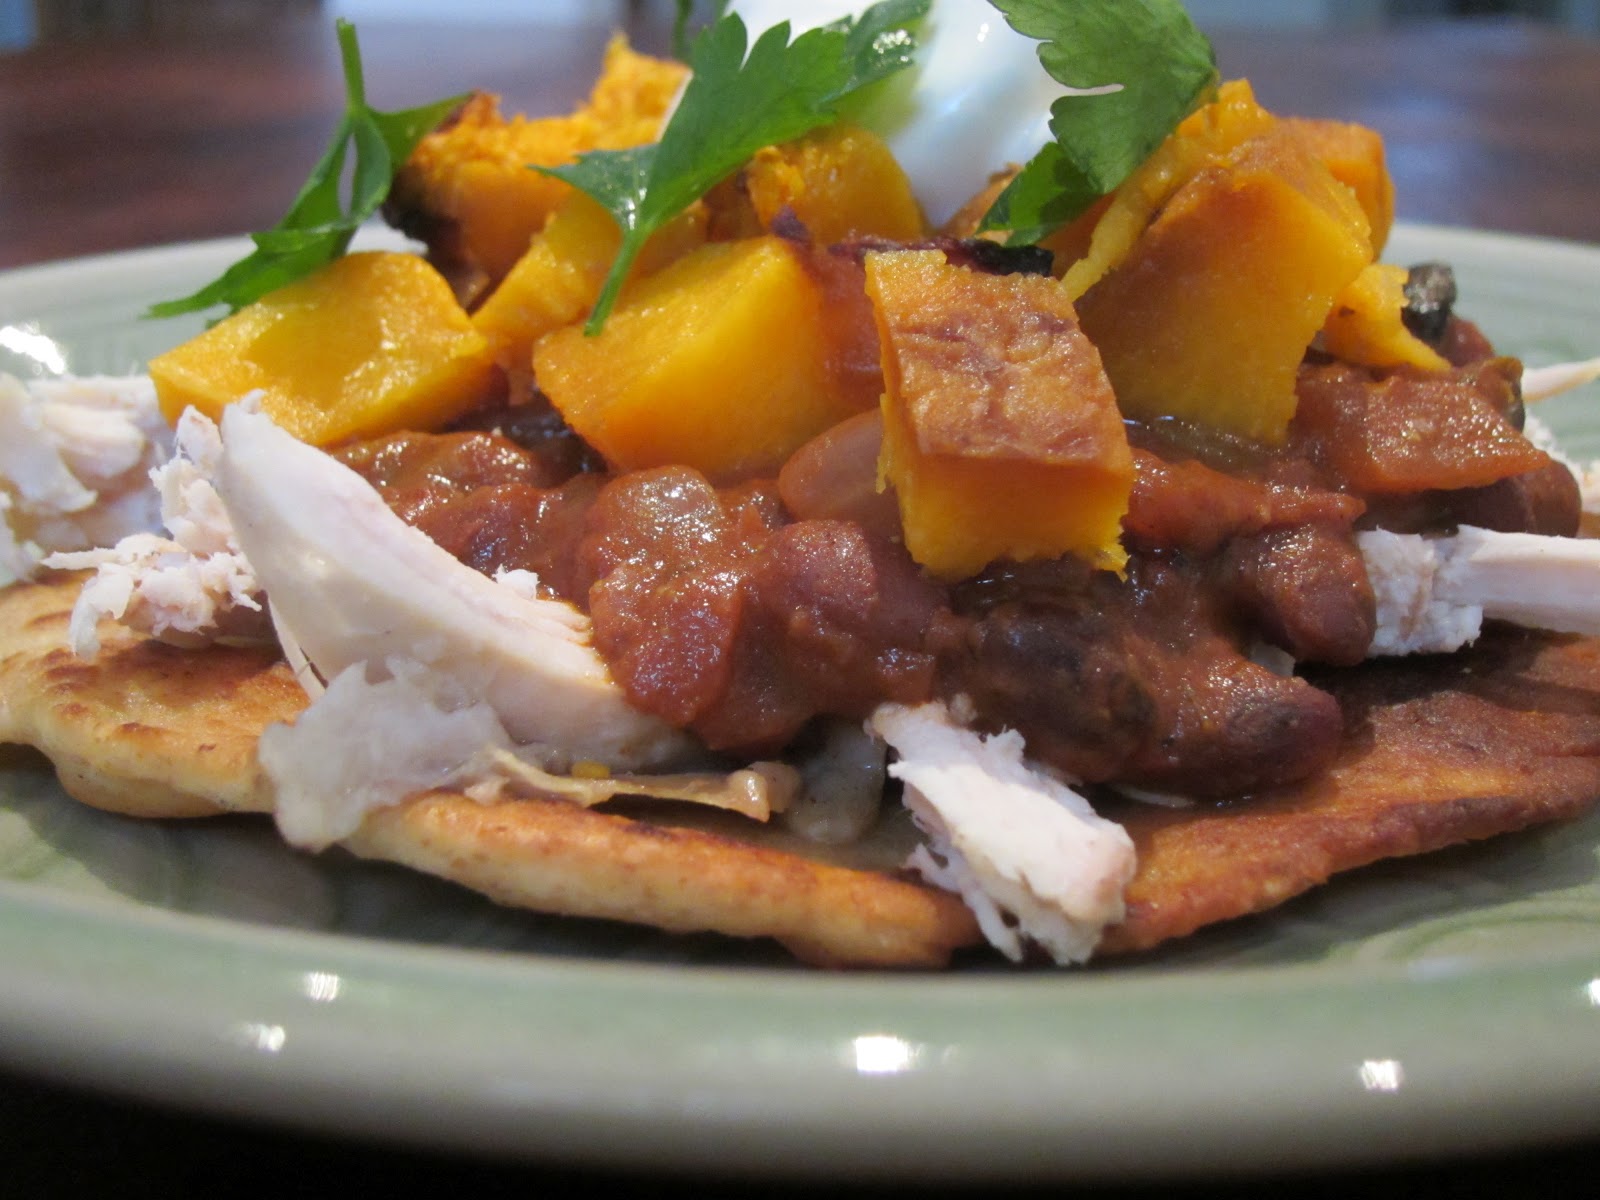
We also tried to treat Mike to local delicacies. There were a few Shwarma, and local seafood spots that were hit and at home, while not cooking authentically Tunisian/North African, I incorporated some of those flavors into what we ate. Beans with preserved lemon, Harrisa glazed chicken, and on Mike's last night I did a little research and made a tagine. Kefta Mkaouara, is a tagine of highly seasoned meatballs cooked in a spicy tomato sauce. Typically at the end eggs are poached on top, I omitted that step as I liked how the tagine looked and tasted without the addition of the rich egg yolks. Maybe next time.


This meal comes together fairly easily, we served it with couscous but I read that it is tradition to serve it with bread. The tagine is placed on the table and each person uses the bread to scoop out meatballs and sauce. Definitely next time. I used all beef for the meatballs though the recipe calls for a mix of lamb and beef. I also didn't use optional cinnamon in the meatballs, use it if you like.

If you don't have a tagine don't worry, a dutch oven or wide saute pan works just as well.

Kefta Mkaouara Tagine
adapted from Paula Wolfert
For the meatballs
1 lb. ground beef or lamb or a combination of the two
2 slices stale sandwich bread, crusts removed and the bread ground fine
1 medium red onion minced
2 cloves of garlic minced
1 teaspoon paprika
1 teaspoon cumin
1 teaspoon salt
1/2 teaspoon ground cinnamon (optional)
1/4 teaspoon cayenne pepper
1/4 cup chopped flat leaf parsley
1/4 cup chopped fresh mint
1/4 cup chopped fresh cilantro
For the tomato sauce
3, 15 ounce cans of tomato puree
1 medium red onion diced
3 cloves of garlic minced
1 teaspoon paprika
1 teaspoon cumin
1/4-1/2 teaspoon cayenne pepper, your preference
1 tablespoon brown sugar
1/2 teaspoon salt
1/4 cup chopped flat leaf parsley
1/4 cup chopped fresh mint
1/4 cup chopped fresh cilantro
Olive oil
3-4 eggs (optional)

For the meatballs:
In a large bowl mix together the bread crumbs, onion, garlic, paprika, cumin, salt, cinnamon if using, cayenne pepper and the fresh herbs. Add the ground meat and knead all the ingredients to gether. Form the meat into walnut sized balls and set aside. 
Heat a large shallow saute pan over medium heat. Add a few tablespoons of olive oil and saute the meatballs in batches until browned, but not cooked through. Set the meatballs aside while making the sauce.
For the sauce:
In a dutch oven, tagine base, or saute pan heat some olive oil over medium high heat. Add the onion and saute until golden brown, about 3-5 minutes. Add the garlic, paprika, cumin, cayenne pepper, brown sugar and salt. Saute for another 3 minutes. Add the tomato puree, reduce the heat to medium low and simmer for 5 minutes. Taste the sauce and adjust the seasonings. Add half fresh herbs reserving remainder for garnish.
Add the meatballs, cover the pan and simmer for 10 minutes or until the meatballs are cooked through. 
If desired, break the eggs over the top of the meatballs and cook until the whites are solid and yolks are partially set approximately 7 minutes. Sprinkle with reserved herbs and serve.
To serve:
Kefta Mkaouara is traditionally served in the same dish in which it was cooked with each person using bread for scooping up the meatballs from his own side of the dish. Couscous is also lovely served with this tagine.

Roasted Carrots


I have always liked vegetables. As a kid, my mom could count on me to eat any vegetable that she put on the table without a hassle, except for cooked carrots. I would eat my requisite spoonful but that was it. 

Mom was busy.  With 3 young children and a fledgling graphic design business there wasn't much creative thought left for meal planning. That is code for the cooked carrots in question were of the frozen variety. Frozen Carrots in Brown Sugar Sauce to be precise. I can still see their orange and white packaging and hear the ominous clank as their frozen mass hit the bottom of her Revere Ware saucepan.

Now you should know, I am not a frozen vegetable snob, but there is just something about frozen carrots that just doesn't translate. They really lose their texture and get sort of mushy and strange. Those early cooked carrot exposures put the whole vegetable off for me.

Slowly I came back around. First there was carrot cake, then raw dipped in Ranch dressing, then carrots in soups and stews. I could eat all those without issue, but I just couldn't get past the whole cooked carrot side dish. Too mushy or too under cooked, smothered in sauce, or strangely seasoned. Carrots were the bitter disappointment of the vegetable world.


When my girls were younger I came across a Barefoot Contessa recipe for roasted carrots. Simply prepared, just carrots, olive oil, salt and black pepper. They weren't too bad. The kids ate them, Andy liked them and we had them a few times more and then they dropped off the radar. Then last week at the market I found gorgeous bunches of carrots. I grabbed one and threw it in my basket, I wasn't sure what I'd do with it but they were so pretty and spring like I couldn't resist. 

I started off with the Barefoot Contessa recipe again and roasted the carrots until they started going golden brown in spots. Then I drizzled on a bit of honey gave them a stir and let them roast a bit longer. When they came out of the oven I gave them a quick sprinkle with some sea salt that was mixed with Bergamot orange peel. 

They were great. 
I've made them 3 times since.
I think I've been converted.

This really isn't a recipe, I'll just tell you how I did it and you can follow along at home if you like.
Preheat the oven to 375. Line a rimmed baking sheet with parchment paper. Scrub and peel carrots, whatever amount floats your boat, and then cut them into 2 inch pieces. Give the carrots a good slosh of olive oil, a sprinkle of salt, a few grinds of black pepper and then spread them out on the baking sheet. Roast the carrots for 30 minutes stirring once halfway through. After 30 minutes drizzle the carrots with a few tablespoons of honey and stir well. Roast them again for another 5-10 minutes. Pull them out and sprinkle with coarse sea salt. The carrots I used were thick and chunky, if yours are thinner you'll probably want to cook them for a lesser amount of time. In the end you want carrots that are a little firm, browned in places and most importantly aren't mushy.

A few weeks back I played around with some flavored sea salts. I used one for this recipe, the fragrant Bergamot orange really played well with the carrots. It's very easy and they make nice gifts. You can find the how to on Heidi Swanson's lovely blog 101 Cookbooks.

All Sorts of Irish Whoopie Pies


For the past few years I have made Irish Car Bomb Cupcakes for a friends St. Patrick's Day party. If I must say so myself, they are always a hit. Whats not to like? Guinness Stout and Chocolate Cupcake? Yum.... Irish Whiskey Ganache Filling? More Yum.... Irish Cream Buttercream Frosting? Stop. Drool. I can't go on....

The first year I made them someone remarked that they were offended by the name, "Really, Shelly that's not very sensitive of you to name them Irish Car Bombs". For the record I am not trying to offend anyone or back any sort of political organization with baked goods. They were named after a cocktail. I didn't do the naming.

Moving here I aimed to keep up the tradition. The baking, not the offending that is. While there haven't been any St. Patty's Day parties (that I was invited to at least) it is the day before our Spring Break, and I think people might need a little sweet to get them through the day. Okay, maybe they need a little booze with some sweet to get them through the day. I wasn't feeling the cupcakes this year, so instead of making cupcakes, I translated the Irish Car Bomb Cupcake into a Whoopie Pie.

Guinness Stout and Chocolate Cupcake = Irish Stout, Chocolate, and Coffee Whoopie Pie
Irish Whiskey Ganache filling = The same
Irish Cream Buttercream Frosting = The same

Very insensitive I know.

I made a very, VERY, large amount of Whoopie Pies. Halve the recipe if you aren't very hungry, or if you're not sharing.

Irish Stout Whoopie Pies with Irish Whiskey and Irish Cream Buttercream Filling
AKA Irish Car Bomb Whoopie Pies
adapted from Endless Simmer
For the whoopie pies:
5 cups all purpose flour
1 cup unsweetened cocoa powder
2 teaspoon espresso powder
2 tablespoon baking powder
1 teaspoon salt
2 teaspoon baking soda
1 cup sour cream
1 cup milk
2 egg
1 cup Irish Stout Beer
2 teaspoon vanilla extract
2 cup lightly packed dark brown sugar
1 cup butter
For the ganache:
2 cups of heavy cream
2 cups chopped bittersweet chocolate
1/4 cup Irish Whiskey
For the buttercream:
3 cups of butter at room temperature
8 cups of icing sugar
1/3 cup Irish Cream Liqueur


For the ganache filling:
In a saucepan bring the heavy cream to a simmer. Immediately turn off the heat, add the chopped chocolate and let the mixture sit for 3 minutes. Stir the chocolate and cream until very smooth. Set aside and let cool to room temperature.

For the whoopie pie:

Preheat the oven to 350. In a mixing bowl whisk together the flour, cocoa powder, espresso powder, baking powder and salt and then set aside. In another mixing bowl whisk together the sour cream, milk and baking soda and then set aside. In another mixing bowl whisk together the egg, beer, and vanilla and then set aside.
In the bowl of a stand mixer, cream together the butter and brown sugar until light and fluffy, about 5 minutes. Scrape down the sides of the bowl. Add the egg and beer mixture and blend. At this point the batter will look horrid and you'll be tempted to toss it. Hang in there.
Alternate adding the flour mixture and the sour cream mixture in three additions beginning with the flour.
Place the batter into a piping bag fitted with a large round tip.  Pipe 1 1/2 inch rounds of batter onto a parchment lined baking sheet. Space the pies 1 inch apart. Bake for 10 minutes. Remove the pies from the oven and allow to cool on the baking sheet for 2 minutes and then transfer the pies to a rack to cool completely.

For the buttercream:
In the bowl of a stand mixer fitted with a paddle attachment beat the butter until very light and fluffy, about 5 minutes.  Add the icing sugar and beat on low speed until the butter and sugar are combined. The mixture will be very thick. Add the Irish Cream and beat until very smooth.

To assemble:
Turn all the pies over and match them up according to sizes.  On one side of a pie spread a nice amount of the Irish Cream Buttercream. I used about 2-3 tablespoons depending on the size of the pie. Don't be stingy now. On top of this add 1 teaspoon of the Irish Whiskey Ganache and then top with a second pie.
Makes approximately 4 1/2 -5 dozen whoopie pies.
They don't hold well so it's best that they are eaten the same day they are made.

Playing with Leftovers


We try to be serious about using up leftovers which can make for some interesting lunches during the week. Last week I had a lunch of mashed potatoes, cauliflower, a lone broccoli spear, and a yogurt that was close to its expiry date. Tonights dinner is a combination of a few leftovers: roasted butternut squash, roasted chicken, black beans, and the tortillas I wrote about yesterday.
The black beans I simmered in a variation of mole poblano sauce, once the beans were ready I crisped the tortilla in a little oil, layered on the chicken, beans, squash and then topped it with a little sour cream and a few sprigs of cilantro.
Delicious!

Chicken and Black Bean Tostadas
For the black beans:
1 medium onion diced
2 cloves garlic minced
3 poblano peppers roasted, seeded and chopped
1 chipotle pepper in adobo sauce minced
1 tablespoon chili powder
2 teaspoons cumin
1/2 teaspoon salt
1 teaspoon cinnamon
1 tablespoon unsweetened cocoa powder
1 teaspoon sugar
1, 14 oz can of diced tomatoes drained
2 tablespoon peanut butter
2 cups chicken or vegetable stock
1 cup of Ale of your choice
1, 15 oz can of black beans drained and rinsed
For the tostada:
6 tortilla
2 roasted chicken breasts shredded
1 small butternut squash roasted, peeled and chopped
sour cream
cilantro

In a saucepan, saute the onion over medium heat until soft and lightly browned. Add the garlic, the poblano peppers, the chipotle pepper and saute for 2 minutes. Add the chili powder, cumin, salt, cinnamon, cocoa powder, and sugar and saute for an additional 2 minutes. Add the tomatoes, peanut butter, stock and ale, bring to a simmer. Add the black beans and cook for 10 minutes.

To assemble the tostada, heat 2 tablespoons of oil in a non-stick skillet over medium high heat. Add the tortillas in batches and cook for 1-2 minutes on each side or until crispy and brown. Add more oil as needed. Drain totillas on a paper towel lined plate. Place one tortilla on a plate. Place some shredded chicken breast on the tortilla, top the chicken with a few spoonfuls of the beans, then some of the roasted butternut squash. Top that with some sour cream and cilantro.

Avocado, chopped tomato, and cheese would also be nice garnishes. If you wish this to be vegetarian then skip the chicken and use vegetable stock to cook the beans.

Tortillas


What have I done?
The children now know that I can make these.

After months of making do without, after months of substituting the local Lebanese flat bread for tortillas, we resigned ourselves to a sad tortilla-less life.
Then I must have sustained an unknown brain injury because yesterday I woke up and thought,
                                             "Today I'm going to make tortillas".

Flour tortillas to be precise, surprisingly they don't sell Masa Harina in Tunisia. Yes, that was sarcastic.
The tortillas were a revelation. They were easy. I don't know why I haven't tried to make them before. Oh, yes. I do know why.

I have now been relegated to full time tortilla maker.

If you have never had the pleasure of a fresh made tortilla I feel very sorry for you. I remember the first time I ate one. It was in San Diego at a little taco stand. The carnitas were perfect, the pico de gallo spot on, but the tortillas. Fluffy, crisp in places, warm, utterly like nothing you could buy in the store. I wanted to be adopted by the woman that made them. Sadly, she already had 10 children and wasn't looking for anymore. She did thank me for the compliment though.

The dough for these comes together in a flash, the rest just takes a little practice and patience.
A few notes:
  1. I do not have a tortilla press, so I used a rolling pin (also known around these parts as a wine bottle).
  2. I do not have a comal  so I used a non-stick frying pan. It worked great.
  3. I do not have access to lard, or shortening. I used canola oil. Next time (I'm certain there will be a next time) I will decrease the amount of oil used to see how that works
  4. I used part whole wheat and part all purpose flour. I really like that, a little more depth of flavor than just straight all purpose flour.
Homemade Tortillas
adapted from Three Many Cooks
4 cups all purpose flour
2 cups whole wheat flour
2 teaspoons salt
1 teaspoon baking powder
2/3 cup canola oil
2 cups hot water

In the large mixing bowl whisk together the the flours, salt, and baking powder. Add the oil and mix together until it resembles sand. I used my hands for this.
Add the hot water, mine had just come off the boil as I was also making coffee at the same time:) Do not use your hands for this part.
Stir it all together until it makes a smooth dough. Gather it together into a ball, cover with plastic wrap and let sit for 30 minutes.
After the dough has had a little rest divide it into 24 balls of even size. Heat the pan you'll be cooking your tortillas in over medium high heat.
Roll each tortilla out into an 8 inch circle on a floured surface. The dough will be very thin. Brush off any excess flour before cooking.
Place the tortilla in the hot pan and cook until the first side blisters and browns a bit, approximately 1-2 minutes. Flip the tortilla and cook on the second side for 1 minute or until lightly browned.
Stack the tortillas and serve warm. Store any leftovers in a zip top bag and keep in the refrigerator.

Bake Sale

We've all been there. Mid-week, it's a school night, and your kid casually mentions around 9pm that they need to bring 2 dozen of something to school the next day for a bake sale.

On those occasions, the kid gets one of two things.
1: Nothing, or,
2: If I am feeling charitable, or dealing with insomnia, I may make muffins or something quick and easy. Like a package of Oreos. Okay, not Oreos, but rice crispy treats are a possibility.
Usually, it's nothing. Sometimes it's a lecture about procrastination. They prefer the nothing part over the lecture.

This time though the kid gave me ample warning. Her friends requested something special. After all, the bake sale is to raise money for the prom.

A prom bake sale. Now that is worthy of something tasty.
I'm pretty sure cupcakes are in order.
Warning: There is enough butter in the recipe to make Paula Deen blush.


Chocolate Chip Cookie Dough Stuffed Cupcakes (With Cookie Dough Buttercream)
Makes 24
Adapted from Kevin & Amanda
For the cupcakes:
3 sticks of butter at room temperature
1 1/2 cups of dark brown sugar
4 eggs
1/3 cup sour cream
2 1/3 cup all purpose flour
1/3 cup unsweetened cocoa
1 teaspoon baking soda
1 teaspoon baking powder
1/2 teaspoon salt
1 cup milk
1 tablespoon vanilla extract
For the filling:
1/4 cup butter at room temperature
1/3 cup dark brown sugar
1 cup all purpose flour
1/3 cup sweetened condensed milk
1 teaspoon vanilla extract
1/2 cup chopped milk chocolate
For the frosting:
3 sticks butter at room temperature
3/4 cup dark brown sugar
4 cups icing sugar, or confectioners sugar
1/2 cup all purpose flour
3/4 teaspoon salt
3 tablespoons milk
1 tablespoon vanilla extract

To garnish: Chocolate chips cookies, chocolate jimmies, chocolate chips, chopped chocolate....you get the idea.

Preheat the oven to 350. Line two cupcake tins with paper liners.
For the cupcakes:
In the bowl of a stand mixer fitted with the paddle attachment beat the butter and brown sugar until light and fluffy, about 5 minutes. Add the eggs one at a time, beating well after each addition and then the sour cream. Scrape down the bowl as needed.
Whisk together the flour, cocoa, baking soda, baking powder and salt and then set aside.  Mix together the milk and vanilla. With the mixer on low speed add the flour mixture to the butter alternating with the milk, beginning and ending with the flour. Mix until just combined.
Divide the batter evenly between the prepared cupcake liners. Bake for18-20 minutes or until they spring back when touched or a tester comes out clean when inserted in the middle of a cupcake.
Allow the cupcakes to cool completely.
For the filling:
While the cupcakes are baking make the filling. In a medium mixing bowl mix together the butter and brown sugar until well combined. Add the flour, sweetened condensed milk, and vanilla extract. Blend until well combined. Fold in the chopped chocolate.
For the frosting:
In the bowl of a stand mixer beat together the butter, brown sugar, and icing sugar until light and fluffy, about 5 minutes. Add the flour, salt, milk and vanilla and beat again until all the ingredients are well combined and the frosting is fluffy.
To assemble:
Cut a 1 inch diameter hole, out of the center of each cupcake. Using a teaspoon fill each hole with a bit of the cookie dough filling pushing it down into the cupcake. After filling, frost and garnish the cupcakes as desired, then stand back and applaud your awesomeness!

Birthday Cake

I love birthday cake. I REALLY love to make those dreamy, tall, layer cakes, covered in billows of frosting and sprinkles. A real proper, leave you in a sugar coma, birthday cake. Nothing makes me happier than baking a cake for the birthday of someone near and dear to my heart, like this one I made for a friend yesterday (with my sous chef Morgan).


To my fantastically funny, smart, and kind friend. I hope the year ahead leaves you delirious with joy, overflowing in peace, and that somehow you get a bootleg recording of Don Giovanni.


Happy Birthday!


White Layer Cake with Blood Orange Curd Filling
Adapted from Martha Stewart
Makes two 9-inch cakes
Ingredients
3 cups cake flour
2 teaspoons baking powder
1 teaspoon salt
1 ½ cups (3 sticks) unsalted butter, room temperature
2 ¼ cups sugar
2  teaspoons pure vanilla extract
1 cup milk
8 large egg whites
                       
Directions
Preheat oven to 350 degrees. Grease two 9-by-2-inch round cake pans; line bottoms with parchment paper rounds. Grease parchment, and then dust with flour. Tap out excess flour and then set aside.
Into a medium bowl, whisk together flour, baking powder, and salt and then set aside. In the bowl of an electric mixer fitted with the paddle attachment, beat the butter and 2 cups of sugar until light and fluffy, approximately 5 minutes. Scrape down the sides of the bowl as needed. Beat in the vanilla extract. With mixer on low speed, add the flour mixture in three parts, alternating with milk and beginning and ending with flour; beat until just combined. Transfer mixture to a large bowl and then set aside.
In the clean bowl of an electric mixer fitted with the whisk attachment, beat egg whites on low speed until foamy. Gradually add the remaining ¼ cup of sugar and beat on high speed until stiff, glossy peaks form, about 4 minutes. Do not overbeat. Gently fold a third of the beaten egg-whites into the batter to lighten. Fold only until combined, there will still be some white streaks. Then gently fold in the remaining whites.
Divide batter evenly between the prepared pans, and smooth with an offset spatula. Bake until the cakes are golden brown and a cake tester inserted in centers comes out clean, 30 to 35 minutes. Transfer pans to a wire rack to cool 20 minutes. Turn the cakes onto rack and peel off parchment. Turn the cakes again and let them cool completely, top sides up.
Once cool, using a serrated knife, trim tops of cake layers to make level. Cut each layer into two even layers. Place one layer on a serving plate, cut side up. Using a pastry bag fitted with a coupler, pipe frosting around the perimeter. This dam will prevent the blood orange curd filling from seeping out. Fill cake with one third of the blood orange curd, about a scant ¾ cup. Repeat with two more cake layers. Place final layer bottom side up and frost entire cake with frosting swirling to cover.

Blood Orange Curd
Adapted from Classic Home Desserts by Richard Sax
12 egg yolks

1 cup sugar

¾ cup blood orange juice

¼ cup lemon juice

16 tablespoons of unsalted butter, cold, cut into pieces

zest of 1 blood oranges
zest of 1 lemon
2 teaspoons of unflavored gelatin
the juice of one blood orange

Place the egg yolks, sugar, blood orange, and lemon juice in a medium saucepan over low heat, whisking constantly. Whisk until the curd thickens enough to coat the back of a spoon approximately 10-15 minutes. Remove from heat. Whisk the cold butter into the curd a few pieces at a time until they are melted and all of the butter is incorporated. Whisk the zest in. Sprinkle the gelatin over the blood orange juice. Let this sit for 5 minutes or until the gelatin softens and the liquid is absorbed.  Heat in the microwave in 10 second bursts until completely melted. Stir into the curd then, let cool and refrigerate. Before using whisk well to remove any lumps. Makes about a 2 cups.

Seven-Minute Frosting
Adapted from Martha Stewart

Makes about 8 cups
Ingredients
1 ½ cups sugar
2 tablespoons light corn syrup
6 large egg whites
1 teaspoon pure vanilla extract
                       
Directions
In the heatproof bowl of an electric mixer set over a saucepan of simmering water, combine sugar, corn syrup, ¼ cup water, and egg whites. Cook over medium heat, stirring frequently, until mixture registers 160 degrees on an instant-read thermometer, about 2 minutes.
Attach bowl to a mixer fitted with the whisk attachment. Beat mixture on high speed until glossy and voluminous, about 5 minutes. Beat in vanilla. Use immediately.


Fun with Friends

Last week some friends were in town for a visit. We grabbed every chance we could for long conversations and drank in every minute we had with them. Some would say we drank wine every minute we had with them.....Ahem......Here are some other highlights from our week.

Rock throwing. They have a lovely rascal of a boy who likes to jump and throw rocks (not at people though because that is not nice). We went for a visit to some Roman ruins, and while the grown ups toured the site, O and I gathered great piles of rocks and threw them as far as a nearly 2 year old boy's arm can throw. The memory of how delightful this was to him continues to bring a smile to my face.

Les Thermes D'Antoinin

Brunch and Potluck dinner with friends. My friend Lauren is a legendary brunch maker. When I can squeeze the Creme Brulee French Toast recipe out of her I'll post it.

I had heard that you could take your own bottle to the corner store and have it filled with fresh, cold-pressed, extra virgin olive oil.


Sure enough, I was able to buy 1 liter of beautiful olive oil for roughly $3.00. Does anyone else find that absolutely amazing? We spent the rest of the evening eating countless baguettes dipped in this peppery, mono-saturated fat, goodness.

We also ate these.


Trimmed down to their hearts and pan roasted with cherry tomatoes and zucchini. And then of course sloshed with lots of olive oil and sea salt that was infused with the zest of a Bergamot orange.

And then we finished the week off with these.


We sent our friends back to Prague on a sugar high, and, with a few extra rocks stowed away in someone's pocket for another afternoon adventure.

Brownies with a Pretzel Toffee Crust
Brownie adapted from Baked: New Frontiers in Baking

Makes 24 brownies
For the Pretzel Crust:
3 cups crushed pretzels
1 cup butter melted
¼ cup dark brown sugar
½ cup caramel sauce
For the Brownie:
1¼ cups all-purpose flour

1 teaspoon salt

2 tablespoons dark unsweetened cocoa powder

11 ounces dark chocolate, coarsely chopped

1 cup (8 ounces) unsalted butter, cut into 1-inch pieces

1 teaspoon instant espresso powder

1½ cups granulated sugar

½ cup packed dark brown sugar

5 eggs, at room temperature

2 teaspoons vanilla extract

Preheat the oven to 350 degrees F.
Grease the sides and bottom of a 9×13-inch baking pan. Line the pan with parchment paper.
For the Pretzel Crust:
In a mixing bowl combine the crushed pretzels, melted butter, and dark brown sugar.  Stir well to combine and then pour into the prepared pan. Using your hands evenly spread the pretzels over the bottom of the pan and press down firmly to form a crust. Evenly drizzle the caramel sauce over the crust and set aside.
For the Brownie:
In a mixing bowl, whisk together the flour, salt, and cocoa powder.
In a large bowl combine the chocolate, butter and instant espresso powder. Set this over a saucepan of simmering water, stirring occasionally, until the chocolate and butter are completely melted and smooth. Turn off the heat, keeping the bowl over the water and add both sugars. Whisk until completely combined about 5 minutes. Remove the bowl from the pan. The mixture should now be room temperature, if not allow it to cool a bit longer.
Add 3 eggs to the chocolate mixture and whisk until just combined. Add the remaining eggs and vanilla and whisk again until combined. It is very important that you do not overbeat the batter at this stage or your brownies will be cakey and not the lovely fudgy texture you want.
Sprinkle the whisked flour over the chocolate mixture. Using a rubber spatula (not a whisk), fold the flour mixture into the chocolate until just a bit of the flour mixture is visible.
Pour the batter over the pretzel crust and smooth the top. Bake for 30 minutes, or until a toothpick inserted into the center of the brownies comes out with a few moist crumbs sticking to it.
Let the brownies cool completely, and then lift them out of the pan using the parchment paper. Cut into squares and serve.
Store at room temperature in an airtight container or wrap with plastic wrap for up to 3 days.

BLOG DESIGN BY DESIGNER BLOGS